Radial arm saw table plans, often available as PDF downloads, offer a focused approach to building a stable and efficient workstation․
These plans leverage the ‘radial’ arrangement – lines from a center – for precise cuts and enhanced usability, streamlining woodworking projects․
What is a Radial Arm Saw Table?
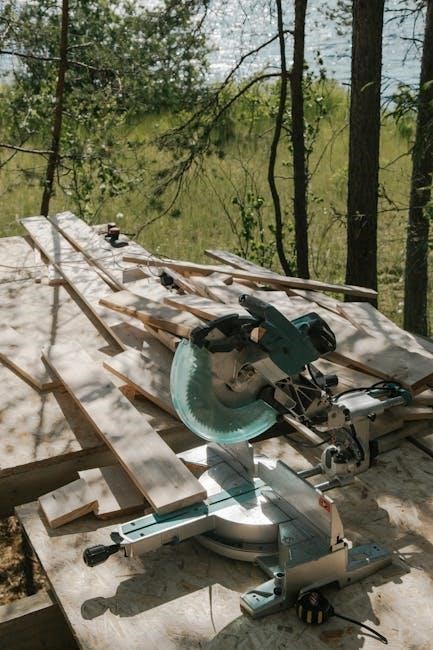
A radial arm saw table isn’t simply a surface for your saw; it’s a meticulously designed workstation enhancing accuracy and safety․ Typically, these tables provide a stable platform, often constructed from wood, to securely mount a radial arm saw․
PDF plans detail how to build a structure supporting the saw’s unique sliding arm motion, allowing for efficient crosscuts and angled cuts․ The ‘radial’ design – emanating from a central point – is key, ensuring consistent material flow and operator control․ These tables often incorporate features like measuring stops and dust collection ports, maximizing functionality․
Why Build a Radial Arm Saw Table?
Constructing a radial arm saw table, guided by detailed PDF plans, offers significant advantages over using a standalone saw․ A dedicated table dramatically improves stability, reducing vibration and enhancing cut accuracy․
It provides a larger work surface, facilitating handling of longer boards․ Furthermore, building your own allows customization – integrating storage, dust collection, and specialized features tailored to your needs․ The ‘radial’ concept ensures efficient material handling, making projects safer and more enjoyable, ultimately boosting woodworking productivity․
Understanding Radial Arm Saw Table Designs
Radial arm saw table designs, often found as PDF plans, range from basic support structures to advanced setups with extensions and integrated features․
Basic Table Design Considerations
PDF-based radial arm saw table plans frequently emphasize foundational stability․ A robust frame, typically constructed from wood or metal, is paramount to minimize vibration during operation․
Key considerations include the saw’s weight and the anticipated workpiece sizes; plans detail dimensions for adequate support․
Simple designs prioritize a flat, level tabletop surface, ensuring accurate cuts․
Accessibility to the saw’s controls and the workpiece is also crucial, influencing table height and overall layout․
Beginner-friendly plans often focus on straightforward assembly techniques, utilizing readily available materials and tools․
Advanced Table Design Features
More complex radial arm saw table plans (often PDF format) incorporate features beyond basic support․ These include integrated dust collection ports, enhancing workshop cleanliness and operator health․
Extension wings expand the table’s surface area, accommodating larger workpieces․
Drawers and shelving provide convenient storage for tools and accessories․
Some plans detail miter saw stations or router table integrations, maximizing workspace versatility․
Advanced designs may utilize adjustable legs for leveling on uneven floors, ensuring optimal saw performance and precision․
Portable vs․ Stationary Table Plans
Radial arm saw table plans, frequently found as PDF downloads, cater to diverse needs with portable and stationary designs․ Portable tables prioritize ease of movement and storage, often featuring folding legs and lighter materials․
Stationary tables, conversely, emphasize stability and robustness, built with heavier lumber and fixed legs․
PDF plans will detail the construction differences․
Portable options suit smaller workshops or job sites, while stationary tables are ideal for dedicated woodworking spaces․
Consider your available space and project requirements when selecting a plan․
Essential Tools and Materials
Radial arm saw table plans (often PDFs) require standard woodworking tools – saws, drills, and measuring devices – alongside lumber and appropriate hardware for assembly․
Wood Selection for Table Construction
Radial arm saw table plans, frequently found as PDF downloads, benefit significantly from careful wood selection․ Hardwoods like maple, oak, or beech provide exceptional stability and durability, crucial for supporting the saw and resisting vibration during operation․
Softwoods, such as pine, are more affordable but may require additional bracing for adequate support․ Plywood, particularly Baltic birch, offers a cost-effective and dimensionally stable option for the tabletop․ Consider wood thickness; 3/4-inch material is generally recommended for the frame, while 1-inch or thicker is ideal for the tabletop to minimize flex․
Hardware Requirements (Bolts, Screws, etc․)
Radial arm saw table plans, often accessed as PDF guides, detail specific hardware needs․ High-strength bolts (grade 5 or higher) are essential for securely attaching the saw to the table frame, resisting operational stresses․
Wood screws should be selected based on wood type; consider using self-tapping screws for easier assembly․ Washers distribute load and prevent damage․ Don’t forget lag screws for robust connections․ Ensure all hardware is corrosion-resistant for longevity, especially in humid environments․
Safety Equipment Checklist
Before commencing construction, referencing your radial arm saw table plans (often in PDF format), prioritize safety․ Essential equipment includes safety glasses to protect against flying debris, and a dust mask or respirator to avoid inhaling wood particles․
Hearing protection is crucial due to power tool noise․ Work gloves enhance grip and protect hands․ Steel-toe boots offer foot protection․ Always have a well-stocked first-aid kit readily available, and understand the safe operation of all tools․

Finding Radial Arm Saw Table Plans (PDF)
Radial arm saw table plans in PDF format are widely accessible online, ranging from free resources to detailed, paid options for builders․
Free Radial Arm Saw Table Plans Online
Numerous websites offer free radial arm saw table plans in PDF format, catering to various skill levels and project scopes․ These plans often provide basic dimensions and assembly instructions, ideal for beginners or those seeking a simple design․
However, free plans may lack the detailed guidance and precision found in paid resources․ Expect potentially limited material lists, fewer diagrams, and less comprehensive support․ Popular platforms like woodworking forums and enthusiast blogs frequently host user-submitted plans, offering a diverse range of options․
Always carefully review free plans for accuracy and completeness before commencing construction, and consider supplementing them with additional research or tutorials․
Paid Radial Arm Saw Table Plans – Benefits
Investing in paid radial arm saw table plans, typically delivered as detailed PDF documents, unlocks several advantages․ These plans generally feature professionally drafted diagrams, comprehensive material lists, and step-by-step instructions, minimizing errors and streamlining the build process․
Paid plans often include advanced design features, such as integrated dust collection ports or extension wings, enhancing functionality․ Furthermore, many providers offer customer support, addressing questions and providing guidance throughout construction․
The increased precision and clarity of paid plans can save time, reduce material waste, and ultimately result in a more robust and reliable table․
Where to Source Reliable PDF Plans
Finding trustworthy radial arm saw table plans in PDF format requires careful consideration․ Reputable woodworking websites and online marketplaces like Etsy often host plans from experienced designers․ Dedicated woodworking plan providers, specializing in shop furniture, are also excellent sources․
Look for plans with detailed reviews and previews, assessing the clarity of instructions and the completeness of material lists․ Online forums and woodworking communities can offer recommendations based on user experiences․
Prioritize sources that guarantee plan accuracy and offer customer support, ensuring a smooth building process․
Step-by-Step Construction Guide
PDF radial arm saw table plans typically begin with cutting components, followed by frame assembly, and finally, secure tabletop attachment for stability․
Cutting the Table Components
PDF radial arm saw table plans detail precise dimensions for all parts․ Begin by carefully transferring measurements from the plans onto your chosen wood, ensuring accuracy with a sharp pencil and square․
Utilize a circular saw or table saw for straight cuts, prioritizing safety with push sticks and proper blade guards․ Miter saw cuts are crucial for angled frame pieces, demanding precise settings․
Double-check all cuts against the plan before proceeding; slight errors accumulate․ Label each component immediately after cutting to avoid confusion during assembly, streamlining the build process․
Assembling the Table Frame
Radial arm saw table plans (PDF) typically guide you to begin with the frame’s base, utilizing robust joinery like screws and wood glue for stability․ Pre-drilling pilot holes prevents splitting, especially with hardwoods․
Ensure squareness throughout the process using a framing square; a slightly off-kilter frame impacts overall table performance․ Clamps are essential for holding pieces firmly together while the glue dries․
Follow the plan’s sequence meticulously, reinforcing corners with additional bracing for maximum rigidity and to support the tabletop’s weight․
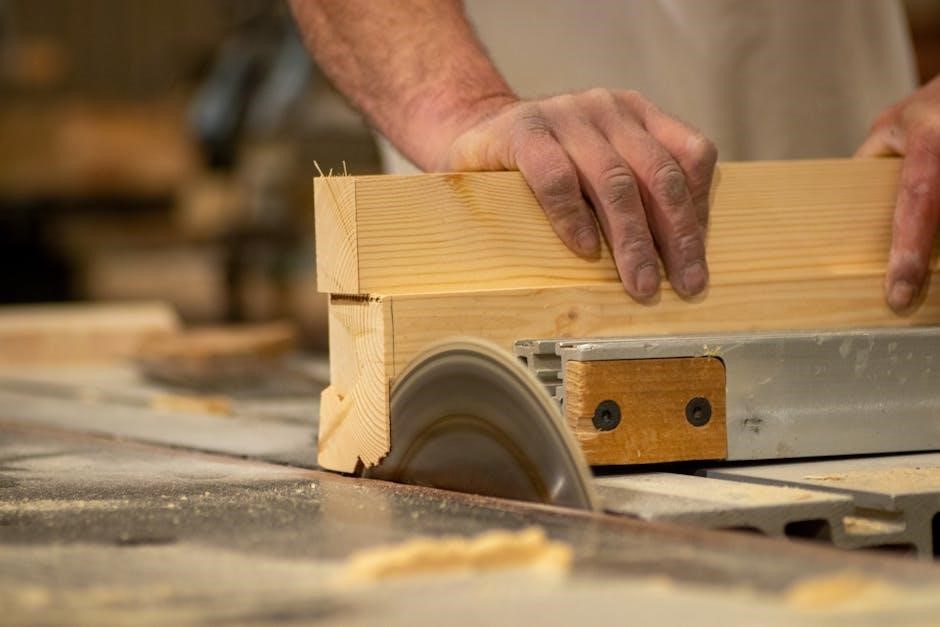
Attaching the Tabletop
Radial arm saw table plans (PDF) detail tabletop attachment, often recommending screws from underneath to avoid visible fasteners․ Counter-sinking screw heads ensures a flush surface, preventing snagging during material handling․
Consider wood movement; allow for expansion and contraction by slightly oversized holes or slotted screw holes․ A perfectly flat tabletop is crucial for accurate cuts, so check for warping․
Applying wood glue in addition to screws enhances stability and distributes stress, creating a durable work surface for years of reliable use․
Integrating the Radial Arm Saw
Radial arm saw table plans (PDF) guide precise saw mounting, emphasizing a secure fit and proper alignment for smooth, accurate operation and safety․
Mounting the Saw to the Table
PDF radial arm saw table plans detail crucial mounting procedures, often involving a robust sub-frame constructed from heavy-duty lumber or steel․ Securely bolting the saw to this frame—not directly to the tabletop—minimizes vibration and ensures stability during operation․
Plans typically specify exact bolt sizes, washer types, and torque specifications for a safe and lasting connection․ Careful consideration must be given to the saw’s weight distribution, ensuring balanced support across the entire mounting surface․ Pre-drilling pilot holes is essential to prevent wood splitting and facilitate accurate bolt placement, as outlined in most detailed PDF guides․
Ensuring Proper Alignment
Radial arm saw table plans (PDF) emphasize meticulous alignment as paramount for accurate cuts and operator safety․ This begins with verifying the saw’s track is perfectly parallel to the tabletop edge, often using a straightedge and shims․
Plans detail how to check for squareness between the blade and the table surface, crucial for preventing binding and kickback․ Precise adjustments to the saw’s mounting and track position, guided by the PDF instructions, are vital for smooth, consistent operation and achieving professional-quality results․
Adjusting for Smooth Operation
Radial arm saw table plans (PDF) frequently detail fine-tuning adjustments for optimal performance․ This includes lubricating the saw’s track and carriage to minimize friction, ensuring effortless gliding during cuts․
Plans often illustrate how to adjust the blade height and angle precisely, vital for various cuts․ Checking and tightening all mounting bolts, as outlined in the PDF, prevents wobble and vibration․ These adjustments, when executed correctly, guarantee a safer and more enjoyable woodworking experience․
Enhancements and Accessories
Radial arm saw table plans (PDF) often suggest upgrades like dust collection ports and extension wings, boosting functionality and workspace․
Adding Dust Collection Ports
Many radial arm saw table plans (PDF) emphasize integrating dust collection․ This is crucial for a healthier and cleaner workshop environment, mitigating airborne particles generated during cutting․
Plans detail port placement – often near the saw’s blade guard – and connection methods to standard dust collector hoses․ Proper dust extraction improves visibility and reduces respiratory hazards․
Consider the hose diameter specified in your chosen PDF plan to ensure compatibility with your existing dust collection system․ Some advanced plans even incorporate multiple ports for enhanced capture․
Building Extension Wings
Radial arm saw table plans (PDF) frequently include options for building extension wings, significantly increasing the table’s support area for larger workpieces․ These wings provide a stable platform for handling sheet goods and lengthy lumber․
Detailed PDF instructions outline wing dimensions, attachment methods – typically using bolts and cleats – and leveling procedures․ Robust construction is vital to prevent sagging or instability;
Consider the weight capacity of your table and wings when selecting materials, ensuring they can safely support your typical projects․ Adjustable wings offer added versatility․
Creating Storage Solutions
Many radial arm saw table plans (PDF) incorporate integrated storage solutions to maximize workshop efficiency․ These plans often detail building shelves, drawers, or cabinets directly beneath the table surface․
PDF guides illustrate construction techniques for sturdy storage compartments, ideal for holding blades, miter gauges, push sticks, and other essential accessories․ Consider utilizing readily available materials like plywood or MDF․
Well-planned storage keeps frequently used tools within easy reach, promoting a safer and more organized woodworking environment․ Customization is key to suit your specific needs․
Safety Considerations During Construction
Radial arm saw table plans (PDF) require diligent safety practices; always prioritize electrical precautions and proper power tool usage during assembly․
Electrical Safety Precautions
When utilizing radial arm saw table plans (PDF), electrical safety is paramount․ Always disconnect power before any wiring or modifications․ Inspect all cords for damage, replacing frayed or cracked ones immediately․
Grounding the saw properly is crucial to prevent shocks; never remove the grounding pin․ Utilize Ground Fault Circuit Interrupters (GFCIs) for added protection, especially in damp environments․
Avoid overloading circuits, and ensure adequate ventilation for motors to prevent overheating․ If unsure about any electrical aspect, consult a qualified electrician before proceeding with construction․
Woodworking Safety Best Practices
Following radial arm saw table plans (PDF) demands strict adherence to woodworking safety․ Always wear safety glasses and hearing protection during cutting and assembly․ Utilize a dust mask or respirator to avoid inhaling sawdust, a common irritant․
Secure workpieces firmly with clamps or a vise to prevent movement during operation․ Maintain a clean and organized workspace, free from obstructions․
Never reach over or around a running blade, and always be aware of your body positioning relative to the saw․ Prioritize focused attention and avoid distractions․
Proper Use of Power Tools
Constructing from radial arm saw table plans (PDF) necessitates mastering power tool operation․ Before starting, thoroughly read and understand the manuals for each tool – saw, drill, sander, etc․ Inspect tools for damage before each use, replacing worn or faulty components․
Use the correct blade for the material being cut, and ensure it’s securely fastened․
Maintain a firm grip and control, allowing the tool to do the work, not forcing it․ Disconnect power when changing blades or making adjustments․
Troubleshooting Common Issues
Radial arm saw table plans (PDF) builds can encounter instability, alignment problems, or vibration․ Careful adjustments and secure connections are key to resolving these issues․
Table Instability
Table instability, a frequent concern when utilizing radial arm saw table plans (PDF), often stems from insufficient frame bracing or uneven floor surfaces․ Ensure all connections within the table frame are tightly secured, utilizing appropriate bolts and screws as specified in your chosen plan․
Adding diagonal bracing to the table legs significantly enhances rigidity․ Leveling the table is crucial; use adjustable feet or shims to compensate for floor imperfections․ A wobbly table compromises accuracy and safety, so prioritize a solid, stable foundation before mounting the saw․
Saw Alignment Problems
Saw alignment problems are common when implementing radial arm saw table plans (PDF), impacting cut accuracy and potentially causing kickback․ Carefully follow plan instructions for mounting the saw, ensuring it’s perfectly square to the tabletop and rails․
Use a square and level to verify alignment at multiple points․ Minor adjustments to the saw’s mounting position may be necessary․ Regularly check alignment, as vibrations during use can cause shifts․ Precise alignment is paramount for safe and accurate operation․
Vibration Reduction Techniques
Implementing radial arm saw table plans (PDF) requires addressing vibration, which affects cut quality and operator comfort․ A robust table frame, constructed from thick, dense wood, is crucial․
Adding mass to the table – through heavier tabletop materials or strategically placed weights – dampens vibrations․ Ensure all bolts and screws are tightened securely․ Rubber feet or pads beneath the table legs further isolate it from the floor, minimizing transmitted vibrations for smoother operation․
Maintenance and Care
Radial arm saw table plans (PDF) benefit from regular upkeep; cleaning, lubrication, and wood treatment protect your investment and ensure lasting, smooth performance․
Regular Cleaning Procedures
Following radial arm saw table plans (PDF) requires consistent cleaning to maintain optimal functionality․ Dust and debris accumulation significantly impacts precision and can lead to premature wear․ After each use, thoroughly vacuum the tabletop, frame, and saw mounting area․
Utilize a soft brush to dislodge stubborn particles from crevices․ Periodically, wipe down surfaces with a damp cloth – avoid excessive moisture, especially on wood components․ Inspect and clean dust collection ports regularly to ensure efficient operation․ A clean workspace contributes to safer and more accurate woodworking․
Lubrication of Moving Parts
Implementing radial arm saw table plans (PDF) necessitates regular lubrication for smooth operation and longevity․ Focus on the saw’s radial arm movement, pivot points, and any sliding mechanisms within the table’s design․ Apply a light machine oil or silicone-based lubricant sparingly to these areas․
Avoid over-lubrication, as it attracts dust․ Periodically check and lubricate table extension mechanisms and locking levers․ Proper lubrication minimizes friction, reduces wear, and ensures precise adjustments, contributing to safer and more efficient woodworking․
Wood Treatment and Protection
Following radial arm saw table plans (PDF) requires wood treatment to enhance durability and resist environmental factors․ Apply a sealant or finish – polyurethane, varnish, or lacquer – to the tabletop and frame․ This protects against moisture, dust, and wear, extending the table’s lifespan;
Consider a finish that minimizes friction for smoother material movement․ Regularly inspect for scratches or damage, reapplying finish as needed․ Proper wood treatment safeguards your investment and maintains a professional appearance․

Cost Estimation for Building a Table
Radial arm saw table plans (PDF) necessitate budgeting for lumber, hardware, and potentially new tools; costs vary widely based on material choices and plan complexity․
Material Costs Breakdown
Analyzing radial arm saw table plans (PDF) reveals key material expenses․ Expect to spend between $150-$400+ on lumber – plywood, MDF, or solid wood – depending on desired quality and table size․
Hardware, including bolts, screws, and potentially metal bracing, typically ranges from $30-$80․ Don’t forget the cost of wood finish (stain, polyurethane) at around $20-$50․
If the PDF plan calls for specialized components like dust collection fittings or extension wings, factor in an additional $50-$150․ Accurate budgeting, guided by the plan’s bill of materials, is crucial․
Tool Costs (If Purchasing)
Building from radial arm saw table plans (PDF) assumes you possess basic woodworking tools․ However, new purchases can add significantly to the cost․ A circular saw ($70-$200) is helpful for initial cuts, while a drill/driver ($50-$150) is essential for assembly․
A sander ($40-$100) ensures smooth surfaces․ Clamps ($20-$60) are vital for secure joining․
More advanced plans might necessitate a router ($80-$250) for edge profiling․ Remember safety gear – glasses, hearing protection, and a dust mask – adding another $30-$50 to the overall tool investment․
Potential Additional Expenses
Beyond wood and hardware for your radial arm saw table plans (PDF), anticipate unforeseen costs․ Finishing supplies – stain, varnish, or paint – can range from $30-$80․ You might need wood glue ($10-$20) and sandpaper in various grits ($15-$30)․
Consider the cost of fasteners like screws and bolts if your plan requires specific sizes not already owned․
Delivery charges for lumber, especially larger pieces, can add $20-$50․ Finally, budget for potential mistakes – extra wood for re-cuts is always a wise precaution, around $20-$40․
Resources and Further Information
Radial arm saw table plans (PDF) discussions thrive in online forums and woodworking communities, offering support and shared experiences․
Explore relevant websites and blogs for tips, and consider specialized publications for detailed guidance․
Online Forums and Communities
Engaging with online forums and woodworking communities is invaluable when utilizing radial arm saw table plans (PDF)․ These platforms provide a space to connect with fellow builders, share progress, and troubleshoot challenges․
Dedicated forums often host threads specifically addressing table construction, modifications, and plan interpretations․ Members frequently share their own PDF plan experiences, offering insights into build difficulty, material substitutions, and potential pitfalls․
Active communities foster a collaborative environment where you can seek advice on everything from wood selection to saw mounting techniques, ensuring a smoother and more successful build process․ Don’t hesitate to ask questions and contribute your own knowledge!
Relevant Websites and Blogs
Numerous websites and blogs specialize in woodworking plans, including those for radial arm saw tables (PDF)․ These resources often feature detailed build guides, material lists, and step-by-step instructions․
Look for sites dedicated to shop furniture or DIY projects, as they frequently offer downloadable PDF plans․ Many woodworking blogs showcase builds based on these plans, providing real-world examples and modifications․
Be sure to vet the source for reliability and accuracy before committing to a plan, checking for user reviews or builder feedback to ensure a successful outcome․
Recommended Books and Publications
While dedicated books solely on radial arm saw table plans (PDF) are rare, general woodworking and shop design publications often contain relevant projects․ Look for books focusing on workbench construction or shop organization, as these frequently include table designs adaptable for radial arm saws․
Periodicals like Fine Woodworking or Popular Woodworking sometimes feature articles detailing shop furniture builds, potentially including plans or inspiration․ Online forums often recommend specific publications with helpful projects․