Hole Punch Centering Guide: Achieving Precision
Achieving accurate hole placement demands careful centering, utilizing techniques from prick punches to milling machines, ensuring alignment and preventing drill bit deviation.
Precise hole punching begins with meticulous centering, a foundational skill across woodworking, metalworking, and leathercraft. Initial marking often involves a prick punch, creating a light dimple for visual confirmation. This is frequently followed by refinement, using magnification to adjust the punch’s location before committing to a deeper impression with a center punch. Accuracy at this stage prevents issues like drill bit walking and ensures proper alignment for subsequent operations, ultimately leading to clean, correctly positioned holes.
Understanding the Importance of Centering
Proper centering is crucial for preventing drill bit deviation, guaranteeing hole alignment, and ensuring successful assembly in various applications, from belts to complex machinery.
Preventing Drill Bit Walking
Drill bit walking, a common issue, occurs when the bit deviates from the intended center during the initial stages of drilling. A precise center punch creates a starting dimple, guiding the bit and minimizing wandering. Regularly inspecting and adjusting the punch location with magnification ensures accuracy. Utilizing a spot drill immediately after center punching further reinforces the starting point, preventing unwanted movement and guaranteeing a clean, centered hole, especially in metalwork.
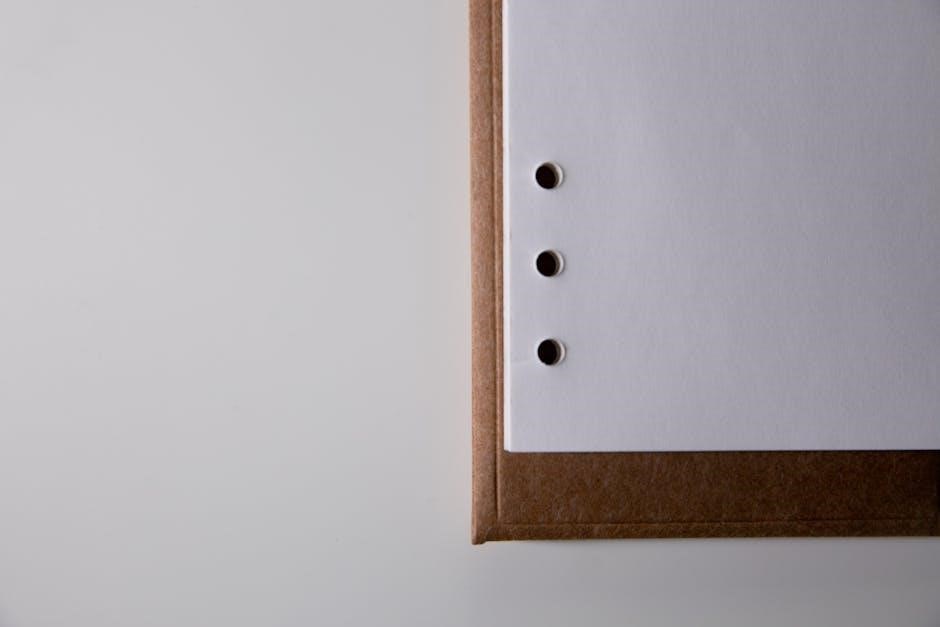
Ensuring Hole Alignment
Precise hole alignment is crucial for functional assemblies like pin joints. Calculating coordinates and employing a mill with a DRO (Digital Readout) and bolt circle routine offers exceptional accuracy. For manual methods, meticulous checking with magnification after prick punching is vital. Adjustable jigs, particularly for oval punches on belts, guarantee consistent placement. Accurate centering prevents misalignment, ensuring components fit seamlessly and function as intended, improving overall project quality.

Methods for Manual Centering
Manual centering relies on prick punches for initial dimples, refined by center punches, and often aided by magnification for precise adjustments before drilling.
Using a Prick Punch for Initial Marking
The prick punch establishes a light indentation, serving as a starting point for accurate hole placement. This initial mark isn’t meant for final centering, but rather a guide. Following the prick punch, careful inspection with magnification is crucial; adjustments are frequently needed to achieve true center. This method is foundational for precise work, especially when followed by a center punch and spot drilling, ensuring minimal drift during the drilling process. It’s a simple yet vital step.
Refining with a Center Punch
After the prick punch, a center punch creates a deeper, more defined dimple. This provides a solid starting point, minimizing drill bit “walking.” Employing a center punch with a 30º tip angle is recommended for optimal performance. Ensure firm, perpendicular pressure for a clean indentation. This step is critical before spot drilling, solidifying the hole’s location and enhancing overall accuracy, particularly in metalworking applications where bit wandering is more pronounced.
Magnification for Precise Adjustment
Visual inspection is key; a magnifying glass allows for meticulous assessment of the initial prick punch mark. Even slight misalignments become apparent under magnification, enabling fine adjustments before committing to the center punch. This is particularly useful when dealing with small holes or intricate layouts. Correcting these minor errors early prevents significant inaccuracies downstream, ensuring precise hole placement and overall project quality.
DIY Centering Jigs & Guides
Constructing simple jigs from scrap materials, especially clear or semi-transparent ones, facilitates accurate oval hole punching and adaptable setups for varying thicknesses.
Simple Jigs for Oval Hole Punches
For centering oval punches on belts, readily fabricated jigs from scrap materials offer a straightforward solution. These jigs, often constructed from clear or semi-transparent materials, allow visual alignment before punching. The design involves a fixed guide for the punch, ensuring consistent placement. Adjustments aren’t typically built-in for this basic form, making them ideal for repetitive oval hole applications where the position is constant. Their simplicity and ease of creation make them a popular choice among leatherworkers.
Adjustable Jigs for Variable Thicknesses
To accommodate varying material thicknesses, adjustable jigs provide a versatile centering solution. These jigs typically incorporate a screw mechanism allowing movement and precise distance adjustments for rapid, continuous drilling. This feature is particularly useful when working with wood or materials of inconsistent depth. The adjustability ensures accurate hole placement regardless of the workpiece’s thickness, enhancing efficiency and precision in projects requiring multiple holes.

Advanced Techniques & Tools
Precision hole layouts benefit from calculated coordinates, DROs with bolt circle routines, and custom center punches featuring sharp tips and optimized 30º angles.
Calculating Coordinates for Precise Layout
For exceptionally accurate hole placement, determining the x and y coordinates for each hole is paramount. This method allows for precise movement when utilizing a milling machine, ensuring each hole is positioned exactly as intended. Alternatively, a Digital Readout (DRO) equipped with a bolt circle routine streamlines this process, automating coordinate calculations and simplifying complex hole patterns. Careful calculation minimizes errors and maximizes precision in your layout.
Utilizing a DRO with Bolt Circle Routine
A Digital Readout (DRO) featuring a bolt circle routine significantly simplifies precise hole layout. This function automates the calculation of coordinates for holes arranged in a circular pattern, reducing manual computation and potential errors. Input the necessary parameters – diameter, number of holes – and the DRO guides the machine to each location, ensuring consistent spacing and accurate centering for efficient and repeatable results.
Custom Center Punches with Sharp Tips
For optimal accuracy when center punching, employing a custom punch with a particularly sharp tip is beneficial. A 30º included angle facilitates a clean, well-defined dimple, minimizing drift during drilling. Regularly sharpening the tip maintains this precision, crucial for accurate hole starting and preventing drill bit walking, especially in metalworking applications where a crisp mark is paramount.

Center Punch Selection & Maintenance
Selecting a center punch with a 30º tip angle is vital; consistent sharpness is maintained through regular honing, ensuring precise and accurate initial markings.
Choosing the Right Tip Angle (30º)
A 30º tip angle on a center punch is frequently recommended for optimal performance across various materials. This angle strikes a balance between creating a defined starting point for drilling and minimizing the risk of the punch skidding across the surface. Steeper angles might wander, while shallower angles may not create a sufficient indentation. Custom center punches often feature this precise angle for enhanced accuracy. Selecting the correct angle directly impacts the success of subsequent drilling and overall project precision, especially in metalworking applications where a clear, defined dimple is crucial for drill bit control.
Maintaining a Sharp Center Punch
Regular maintenance is vital for a center punch’s effectiveness. A dull tip requires excessive force, increasing the chance of slippage and inaccurate centering. Inspect the tip frequently for wear or damage. Sharpening can restore a worn tip, ensuring a clean, precise indentation. Consistent sharpness guarantees the drill bit initiates accurately, preventing “walking” and maintaining hole alignment. A sharp punch delivers a crisp mark with minimal effort, contributing significantly to overall project accuracy and efficiency.
Applications of Accurate Centering
Precise centering is crucial in woodworking, pin joint assembly, and leatherworking – notably for belt holes – guaranteeing structural integrity and aesthetic quality.
Woodworking and Board Processing
In woodworking, accurate centering ensures clean, aligned holes for joinery, dowels, and screw placements. Utilizing a prick punch for initial marking, followed by a center punch, minimizes wood splitting and ‘drill bit walking’. Clear or semi-transparent jigs, easily fabricated from scrap materials, aid in consistently positioning oval hole punches, especially during board processing. Careful attention to centering dramatically improves project quality and structural soundness, preventing misalignment issues during assembly.
Pin Joint Assembly
Precise hole centering is paramount for successful pin joint assembly, guaranteeing smooth articulation and robust connections. Employing a center punch after initial prick-punch marking establishes a defined starting point, preventing drill bit wander. For multiple pin joints, DIY jigs offer repeatable accuracy. Calculating coordinates and utilizing a mill further refines hole layout, ensuring perfect alignment and minimizing friction within the joint, ultimately enhancing the longevity and functionality of the assembled component.
Leatherworking (Belt Holes)
Consistent and aesthetically pleasing belt holes require meticulous centering, especially when using oval punches. Simple, homemade jigs crafted from clear or semi-transparent materials aid in precise alignment. These jigs allow for visual confirmation before punching, preventing skewed holes. Careful initial marking with a prick punch, followed by a center punch, ensures clean, accurate placement, enhancing both the functionality and appearance of the finished leather goods.
Troubleshooting Common Centering Issues
Addressing drill bit walking involves refining punch location with magnification, correcting misaligned punches, and ensuring a sharp center punch tip for accurate starts.
Dealing with Drill Bit Walking
Drill bit walking, a frequent frustration, often stems from an insufficiently defined starting point. Employ a prick punch to create a light dimple, then meticulously check its position using magnification – adjustments are often necessary. Following this, a firm strike with a center punch establishes a solid guide.
If walking persists, ensure your center punch has a sharp tip and the correct 30º angle. A spot drill further refines the starting point, minimizing deviation and promoting accurate hole placement, especially in metal.
Correcting Misaligned Punches
Misaligned punches compromise accuracy; careful observation is key. After the initial prick punch dimple, utilize magnification to critically assess its position relative to the desired hole location. Small adjustments to the punch’s placement are often required to achieve true centering.
For repeatable accuracy, consider creating simple jigs from scrap materials, particularly for oval hole punches. These guides ensure consistent alignment and minimize errors during the center punching process.
Materials for Creating Centering Guides
Scrap materials and clear or semi-transparent plastics are ideal for crafting DIY centering guides, offering visibility and ease of adjustment for precise hole placement.
Using Scrap Materials
Creating centering guides doesn’t require expensive resources; readily available scrap materials work exceptionally well. Pieces of acrylic, polycarbonate, or even sturdy cardboard can be repurposed. These materials are easily cut and shaped to form simple jigs for oval hole punches or more complex guides.
The key is to ensure the material is stable and doesn’t flex during use. Simple designs, like those for belt hole alignment, are particularly suited to scrap material construction, offering cost-effective precision.
Clear or Semi-Transparent Materials
Employing clear or semi-transparent materials, such as acrylic, offers a significant advantage when creating centering guides. Visibility through the material allows for precise alignment with the workpiece and existing features. This is particularly useful for aligning oval hole punches on belts, enabling accurate positioning before applying force.
These materials facilitate easy marking and adjustments, minimizing errors and maximizing centering accuracy. Their durability also ensures the jig can withstand repeated use.
The Role of Spot Drilling
Following a center punch, spot drilling creates a shallow indentation, guiding the drill bit and preventing wandering for enhanced accuracy and clean hole starts.
Following Up Center Punch with Spot Drill
After establishing a precise location with a center punch, employing a spot drill is crucial for refining accuracy. This initial, shallow drilling creates a conical seat, perfectly guiding the larger drill bit and minimizing “walking.” The spot drill’s smaller diameter ensures a stable start, especially vital in metals. It reinforces the center punch mark, preventing deviation and contributing to a cleaner, more accurately positioned final hole. This two-step process—punch then spot drill—significantly enhances overall precision and hole quality.

Accuracy Considerations for Different Materials
Wood requires less force than metal when centering; metal demands sharper tips and precise spot drilling to prevent bit wandering and ensure accurate hole placement.
Wood vs. Metal Centering Techniques
When working with wood, a lighter touch with the center punch is sufficient, as the material is softer and less prone to deformation. However, metal necessitates a firmer, more deliberate strike to create a distinct dimple. Spot drilling is crucial for metal, guiding the drill bit and preventing ‘walking’.
For metal, utilizing a center punch with a 30-degree tip angle is recommended for optimal indentation. Wood benefits from careful initial marking with a prick punch, followed by refinement before the center punch is applied, often aided by magnification for precision.
Integrating Centering with Milling Machines
Milling machines offer unparalleled precision; calculate coordinates or employ a bolt circle routine on a DRO for accurate hole layouts before center punching.
Using Mill for Precise Hole Layout
For exceptionally accurate hole placement, leverage the capabilities of a milling machine. Precisely calculate the X and Y coordinates for each desired hole location. Input these coordinates into the mill’s control system, allowing for highly accurate positioning of the cutting tool. Alternatively, utilize a Digital Readout (DRO) equipped with a bolt circle routine, streamlining the process for repetitive hole patterns. This method minimizes errors associated with manual measurement and marking, resulting in consistently centered and aligned holes, especially crucial for demanding applications.
Future Trends in Hole Centering Technology
Automated centering systems are emerging, promising increased speed and precision in hole creation, reducing manual intervention and enhancing overall manufacturing efficiency.
Automated Centering Systems
The future of hole centering leans heavily towards automation, integrating vision systems and robotic arms for unparalleled accuracy. These systems utilize pre-programmed coordinates, eliminating human error and drastically reducing setup times. Expect advancements in self-correcting mechanisms, adapting to material variations and tool wear. Such technology promises consistent, high-volume production with minimal waste, particularly beneficial in complex manufacturing processes requiring precise hole placement across numerous components. This shift will redefine precision engineering standards.
Resources for Further Learning
Explore online forums like Practical Machinist and Leatherworker.net for community insights, shared jigs, and troubleshooting advice on hole centering techniques and tools.
Online Forums & Communities
Engage with fellow enthusiasts on platforms like Practical Machinist, a hub for manufacturing technology discussions, where users share jig designs and precision layout methods. Leatherworker.net offers specialized advice for centering oval punches on belts, showcasing simple, scrap-material jigs. These communities provide valuable troubleshooting tips, alternative techniques – from calculating coordinates to utilizing DROs – and a space to learn from experienced practitioners regarding center punch accuracy and material-specific approaches.